Poco2 Escape 3 - Walkthrough

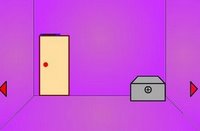
Poco2 Escape 2 seems the most popular room escape game of the last month. Now Poco2 Escape 3 is online and ready to play. Escape the third Poco2 Room by finding items and clues that will help you on your goal.
Have fun!!!


Play Poco2 Escape 3

Walkthrough:

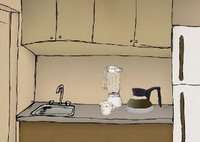
1. Check all the drawers in the kitchen counter area. You should have 2 Hearts, A dog badge, and a letter B. Also, remember that Fox is a green two. Click the picture and take another heart.

2. Go right. You'll find a fridge. Click on the bottom left of the fridge to find the letter G. Go back and open the fridge. Take the heart and click the fridge again and take the other heart. Remember, Dog is a red four.

3. Click on the top right of the fridge to find a frog. Click the towel hanging from the lower part of him to make the key drop. Go back to the front of the fridge and click the bottom right to take the key and the heart.

4. Go right and use the orange key on the upper cupboard. Click the area with the dishes. Click on the little green Gremlin. He will run away and leave a key. Open the book and take the heart. Then take the cup, and then click the dishes and take the letter P.

5. Use the red key to open the calendar thing.

6. Go right again to the little house. Click on the right side of it to find a bunch of numbers. This is the number of hearts you put into the calendar boxes for each number to get the items. Take the heart.

7. Go to the calendar by the fridge and make sure to mark down the numbers. Then, go to the calendar box and place them in the correct slots. For blue, place one heart in box 5, two hearts in box 10, two hearts in box 13, and three hearts in box 29. Click on box 1 to get the Red Handle. You can put this on the second hole in the sink for hot water to come out. For red, place two hearts in box 11, three hearts in box 15, one heart in box 25, and two hearts in box 27. Click box 23 for the Badge of Fox.

8. Go to the fridge and click the top right part to go to the frog. Click the Gremlin. After he runs away, go to the bottom right of the fridge and get the frogs arm and place it back on him. He will give you the Badge of Bear.

9. Go to the cupboard and click on the ferris wheel above the dishes. Place the bear in the red 1. Place the dog in the red 4. Place the fox in the green 2. Take the Y and click the Gremlin so he runs away. Go to the dishes and take the handle.

10. Put the handle in the unopenable cupboard in the kitchen counter. Open it and take the R.

11. Go to the picture above the little dollhouse and place all the letters in their holes. Take the piko piko hammer.

12. Go to the picture above the kitchen counter. Remove the pieces of the toy starting at the bottom. Once the Gremlin runs away, zoom out and take the head. Go back to the picture and place the pieces back together. Green, Blue, Red, Yellow, then his head, then the hammer. He will give you an orange handle. Put this on the sink and fill your glass with orange juice.

13. Go to the fridge and open the freezer. Place the orange juice in the freezer and give it time to freeze.

14. Click on the lower left of the double cupboards with the calendar thing. You'll find the gremlin, click him and he will run away.

15. Go to the freezer and take the Gremlin. Put him under the hot water. He will give you a yellow key.

16. Go to the toy house. Use the yellow key. Talk to the bear, he will give you a hat and a key to leave. Use the key to leave and you're done.

Source: Escape the Room, Games For Bored


Technorati Tags
Read More
    5

Cat Love - Walkthrough

Cat Love is a Russian point and click game. In this game, you need to point'n'click to right places at right times to help the little kitty who has got some trouble with surrounding.
Good luck!!!


Play Cat Love

Walkthrough:

Click telephone
Pipe under the dog
Hole under raven
The lever after the cat passes the pool
Drag the plant to the left of the dog
Click the closed shutter on the left
The lady in pink.
Click the line next to the other lady
The cloud on the right (next to the other cat)
The board below the lady in the pink
The chiminey
Then drag the ladder under the dog by the cat in the window.


Technorati Tags
Read More
    0

Nightmares Episode 3 - Walkthrough

Nightmares The Adventures Episode 3 is the third episode of Nightmares Episode 1 point and click type adventure game.
You try to help Victor face his fears in the Land of Nightmares so he can sleep in peace!
Good luck!!!

Nightmares Episode 2 Walkthrough

Play Nightmares Episode 3

Walkthrough:

1. Take Rope and Key
2. Use Key with Closed Book on Floor
3. Klick Ladder
4. go north West
5. Take Glasses and use rope with Hand and go back
6. Go Left
7. Use Glasses with Cat, take feather
8. go Right book side
9. take Carrot, Wooden Arm and Snowman body
10. go back an left book side
11. Take hat 2stones snowball,hat and second arm.
12 Build snwoman (Body,chest,snowball, Stones carrot hat und teo arms.
13. go to other book side. Klick shovel
14. Go back into first room, Go right.
15 Solve push riddle. Use Shovel with glass
15 go to first room, do second way from left
16 Use Feather with feeds
17 Go Back and ready


Technorati Tags
Read More
    11

Nightmares Episode 2 - Walkthrough

Nightmares The Adventures Episode 2 is the second episode of Nightmares Episode 1 point and click type adventure game.
You try to help Victor face his fears in the Land of Nightmares so he can sleep in peace!
Good luck!!!


Play Nightmares Episode 2

Walkthrough:

1. Take 4 nuts from palm tree (one at a time)
2. Take bucket full of water and net
3. Go back to mum monkey and take planks found there (near entrance of the exit leading to palm tree)
4. Put net under small monkey
5. Pull on hanging plant to let rock fall on snake's head
6. Go back to mum monkey where u'll find small monkey.
7. Take 1 coconut at a time and direct it at the first vacuum cleaner.
8. The small monkey will throw coconut at cleaner and block it's entry
9. While coconut is still in cleaner's opening, go to the chasm just below it and so on... (when u r out, then send coconut to another cleaner etc..)

Source: KOL


Technorati Tags
Read More
    16

Nightmares Episode 1 - Walkthrough

Nightmare The Adventures Episode 1 - Broken Bone's Complaint is the English version of French Cauchemars Les Aventures point and click adventure game series.
In first episode, you try to help Victor face his fears in the Land of Nightmares so he can sleep in peace!
Good luck!!!


Play Nightmares Episode 1

Walkthrough:

Here is what you do start by getting the sickle, the newspaper and the bone.

Go to the right and go into the room on the right, open the last coffin on the right and get the maraccas.

Leave that room and go to the room on the left. use the sickle to cut the spider web and the chunky dude will give you his bat,

Leave that room. Use the bat at the top of the tree and the limbs will catch the bat allowing you to get the key.

Go back to the main area and go to the left. give the dog the bone and get the trash cans.

Go into the room on the right and get the guitar from the coffin and grab the torch on the far left.

Leave that room and go to the one on the left.
Use the torch on the right side of the door and use the key to release the clown from his chains.

Go back to the main area and give the maraccas to the chubby dude, give the drums to the clown and give the guitar to the kid that you play as.
The skeleton gets up and starts dancing and you have beaten the game.

Source: Escape the Room


Technorati Tags
Read More
    6

Glove Escape - Walkthrough

Glove Escape - Escaping Game Sample Edition 1 is a new Japanese room escape game. Gather gloves and use them right place.
Good Luck!!!


Play Glove Escape

Walkthrough:

pick up all obvious gloves
open drawers and get gloves
with bottom draw open click right and rear of cupboard for flashlight
click right hand corner of floor on view with broken wires, pick up black box
open safe
while safe is open select black box and click on yellow button
collect 2 gloves
back away and pick up glove from floor
use 2 big gloves to repair wires
pick up key
open door
poor yourself a drink!


Technorati Tags
Read More
    0

Punikin Escape - Walkthrough

Punik Escape Game - Recapture from Mysterious Thief Gold is another Japanese point and click type rooom escape game. In this escape game, again you need to search around to collect items and clues in order to escape the room by using them on proper places. Good luck!!!

Play Punikin Escape

Walkthrough:

Turn right, to the kitchen. It's time to start collecting the multiple, various, counter-intuitive and oh-so-many items you will need to complete this game. Pick up the following:

1. What appears to be cocoa powder, from cabinet. While you're in that view, click up and get ID card, too.
2. Strange while object (candle) and bucket from under stove/sink cabinets.
3. Pink thing from counter.
4. Apple and glasses from bottom and top drawers, respectively.
5. Banana from fridge.

While you're here, stick that banana in the freezer. I know, it seems crazy, but trust me when I tell you that it will seem even crazier later.

Also, fill the bucket with water. It's heavy to carry around, but you have to do it.

Also, shake that hood thing above the sink until the key falls down. You can't get it yet, so just leave it for now.

Turn right again. See that brown door? Go through it. Pick up a whole lot more items:
1. four, count 'em, four fliers with phone numbers on them. There is also a number on the thing on the table, which you can zoom in and look at if you want to. There is some lack of clarity about whether or not you need to dial any or all of these numbers.
2. three pieces of a wooden stool. They really should go together, and if you click on "about item" with the big one, you might be able to assemble them. Keep trying, it seems to be finicky about this.

Notice how, even if you succeed there's still a nail sticking out? You're going to have to pound that in somehow. Despite the fact that you have like fifty-seven items already, however, there doesn't seem to be anything to pound with. Hmmmmm.......

Back up. You're at the shelves. Pick up tank, little blue thing, hose, green AIR thing, light blue bottle, fish food, and picture of your beloved fishies.

awwwwwwwww....... cute fishies.

Turn left and go back to the kitchen again. Get the banana out of the freezer and use it to pound in that nail on the stool. Do NOT say I didn't warn you about the insanity.

Go right twice. see that big box? pick it up.
Now, check it out in about items. Open it! WOW! There's..... another box inside. Cool. I wonder what's in THAT box? It must be pretty special to be packaged up so carefully. Go on, open it and find out. I'll wait.

yeah, it's another box. This goes on for quite a while.
In the same view, take your footstool (all banana pounded and sound to stand on now, and use it to feel around the top of that air conditioner vent or whatever it is until you get a hand on a stick.

That's right. A hand on a stick. Examine it. Now you have a hand on a LONG stick. Just what you need to reach that key in the kitchen. Go get the key and come on back.

flip through the calendar until you find a safe. Use the kitchen vent key to open it. Get the little piece of circuitry. But then, click up to find a new view, remove the false back, and get the bigger piece of circuitry. You are correct in thinking that they go together. Put them together.

Turn right again. That's correct: this room has five sides. I don't know why either. I also do not know why anyone would fishnap your beloved pet and hide him in a high-tech, secret underground vault. But there is evil in the world, it seems, and you must fight it with bizarre items hidden around a strange room. Be glad they are not harder to find.

Anyway, see that clock? Use your handy stool to get it. Examine it, too. Weird code on the back! Cool! Confusing!!! See that weird machine? What's that? Take a look at it through the glasses, and see what that does.

Whoa. THAT can't be good.

And now, turn right. You're back where you started. Open the door. You might need to do this with the pink key selected. You might not. In any case, when you do it properly (whatever that means) someone will deliver a G to you.

Yes, A "G"

It SHOULD fit in the G-shaped hole in the weird machine from the previous screen, but it doesn't. Evil in the world again, I guess. Go to the kitchen, instead.

Turn on the burner, light the candle, and use it to burn the G. I know. Just do it.

Now it fits in the weird machine. Good. You're ready to move to the maze. Get ready.

Okay, you have to get through that door behind the weird machine to get to the maze and rescue fishy. You can actually die here, and you KNOW you don't want to go back and collect all those items again, so do the steps carefully.

FIRST, you swipe the ID card to open the door. DO NOT GO THROUGH THE DOOR YET. Unless you want to see that screen and start over, then go ahead.

SECOND, put on the glasses. The "G" has made the lasers flash on and off.

THIRD, wait for them to go off. Click the door QUICKLY while they are off. You're in the maze!!!!

Now, the maze has two levels. You are in the upper level now. You control your movements using those four green arrows, and you make a map just above them as you go. The red arrow is you. Use this to figure out where stuff is. In the upper level you need to get what I guess is a router box. It's toward the bottom left, but not quite at the very bottom. You also need to find the ladder to the lower level. It's at the top left corner.

Feel free to explore the rest of the maze if you like that sort of thing, but I can tell you that the scenery is pretty uniform.

On the lower level, right at the base of the ladder, is where you put that router box. Better do it now before the minotaur eats you.

Now, find you way to the bottom right corner of the map. There will be a green door there. Click red button and then forward arrow to go in. Pick up that key. Click the grey button and stick the upsidedown clock in the slot. Wow. I guess it made sense after all. Click the grey button again for a SECRET ROOM!

Actually, now is maybe a good time to go up that ladder and see where it goes. The key you picked up opens the padlock.

Rats! All that for nothing! While you're up here, check out the computer. When it loads, notice the server name (goldserver). Go back down the ladder and enter the secret room.

Geez this is a long game. Am starting to regret writing this.

Okay, now check out your apple. I don't know why it's an apple, but it is. Use the mysterious kitchen counter pink thing on it. It'll give you a user name (gold) and password (kaito). Use them on the computer.

Once you're in, click on that icon that looks like the vault. When you're in it, just type "goldserver" and it should connect you. At least, if you've actually looked at the upstairs computer it should.

Okay, now use your pink circuit thingy on the computer. Here is where you solve the color puzzle first figured out by Ragtolin. His post above (number 80) has a helpful screenshot. If it were me, I'd rep him or get him a little gift or something for that. Not that you would make the same choice, of course. You do whatever you think is best.

look at the groups of three colored dots at the bottom of the circuit you put on the screen: there should be four groups of three. For each group of three, you can use the color wheel that the always fabulous Ragtolin provided to figure out what those colors combine to make.

For example, R B G together make white.
RBW make magenta
GBW make cyan
RGW make yellow

Then, set the four buttons to those colors and hit enter. You have to do this twice. The screen will then stop accepting input, and when you back up, the vault will be open.

The vault is open. Go get your fishy! Hello, fishy fishy! How I've missed you! You are a good and clever fishy and a wonderful pet. Let us never be parted again!

You're almost done. Go up the ladder and back to the very first screen with the door. Open the door. Click on the open door. Once you do, you should be able to add things to the bucket, which luckily is already filled with water. They are light blue bottle, fishy (ah, fishy!), and cocoa powder. Now you can finally leave the house.

Keep clicking arrows until you get to a room with a table for your fish. Perhaps it is a room of your own. For a fish of your own. I certainly hope it is.

Now, you must set up a home for fishy fishy. Not to be confused with mrfishy here. She's not your fish. So please treat her with respect and courtesy.

To set up, click in this order: tank, bucket with fish and accoutrements, weird blue thing, tube, green air thing, fish food.

Awwwwww. Look at that. Fishy missed you too. That's nice.
Now, you can either call the police at this point (dial 110 on your phone and page through some japanese) or you can let the meanies that did this to your poor innocent fish go free.

It's your choice. Some would say a little japanese paging is a small price to pay for a pet of this caliber. But again, it's totally up to you.

Now click on the coin that has appeared in your inventory. Now click on it again.

CONGRATULATIONS!!!!!

Source:
Lazylaces


Technorati Tags
Read More
    0

Cave Escape - Walkthrough

This is a new room escape game by Gameshandbook. This time you need to escape a cave (or better said help people to escape) by collecting and using items.
Good luck!!!


Play Cave Escape

Walkthrough:

Click on cave entrance.

Pick up tire behind bear.

Go left two screens, give tire to drowning man.

Click man repeatedly to have him swim to shore.

Go left two screens, and collect the man's hat.

Go left another screen and give the hat to the man. Click him, and he will try to throw it over the snake. Have him keep trying, and eventually it will capture the snake.

Go left and pick up the rope the skeleton is holding.

Go left two more screens and give the higher man the rope. Click him again to extend it, and then click on the lower man to have him jump to it.

Collect the missing puzzle piece from the right side of the screen.

Go back to the puzzle and do it. The large piece is tricky, drop it in lower than it has to be. Use the missing piece to complete puzzle.

Now every one should be congregating by the bear. He'll run away, leaving a bizarre pink thing. I think it looks like a piece of meat.

Go right and put the [meat] on the circular rock. A bat will fly by and knock it out of the way. Dig where the rock was, and you will uncover some dynamite.

Go right three times, and put the dynamite in the hole in the center rock.

You did it!


Technorati Tags
Read More
    3

Tucoga's Room 2 - Walkthrough

This is the sequel to Tucoga's Room, a Brazilian room escape game.
Gather and use items in order to escape. You can set the language to English on the pc in the game.
Good luck!!!


Play Tucoga's Room 2

Walkthrough:

01) Light on
02) Over the computer in the shelf completely right blue book - > CD
03) Middle, light blue book down - > blue part of the charm cube
04) CD shelf to the left of the books, right row, lightgreen CD - > CD
05) Over the stereo system click - > key 1
06) Raise all three couch cushions - > key 2 + battery 1
07) Put down all the cushions, something falls to the floor - > key 3
08) click the right lower edge of the table - > yellow part of the cube
09) click between couch and cabinet - > Orange part of the cube
10) In the shelf right above beside flower pot - > remote; completely right on the shelf - > lamp rope; to the left of the plant - > Paper hat
11) in the corner of the room, to the left of the bathroom door, click the corner o fthe carpet - > green cube part
12) on the ceiling, of the corner to the left of the corner you just got the green piece from, click - > battery 2
13) With the three keys, open we the right door of the shelf with the pictures - > hammer; the left door under the TV - > cutter and CD; and the left door in the bathroom - > light bulb
14) In the left bath cabinet is another key, in the middle of the edge that is the rear, right corner of the cabinet - > key 4
15) With key 4 open the right bathroom cabinet door - > take the paper
16) Lower, left corner of the garbage can - > key 5
17) With the hammer, smash the mirror, click on the bottom right of the green poster - > CD
18) With the hammer, hit the tile the is 4 right and 3 down from the top left corner of the room - > red part of the cube
19) click under the edge in the toilet - > key 6
20) With the two new keys, open the right door under the TV - > tape; and the left door of the shelf - > grey cube
21) Cut the paper hat and put it on the lamp along with the string and the light bulb, turn off the lights and look at the piece of paper for a 3 digit code
22) Before turning on the light, click on the white lite up area on the celing - > press the white button
23) A door will appear on the floor and the door down the hall is now unlocked. Go through the door to go back into the room from the first game
24) On the wall, note the order of the colors (yellow, red, green, blue, purple, white)
25) put the batteries into the remote, go to the TV, turn it on (power button) and enter the 3 digit code from the paper - > get a four digit code
26) on the picture that hangs close to the lamp, click the colors in the order (from left to right) to you saw on the wall in the other room - > safe appears
27) enter the 4 digit code from the TV - > white cube piece.
28) Drop all the colored pieces onto the grey cube to make the key box, then turn off the lights and turn to the shelf, on the table you will see a box of light, place the colored key box in the square outline- > get the main key
29) With the lights still off, unlock and open the door next to the lamp, BUT DO NOT GO THROUGH THE DOOR!!!
30) There is some writing on the door, so to make a copy of the writing, use the tape on the paper and then the paper on the written on area. After you have the copy of the writing, use the cutter on the paper to cut out the holes.
31) Zoom in on the TV, switch it on and enter the 3 digit code from before and place the paper on the screen - > note the white/black dot combinations
32) Turn the light on, then it is not so dark. Go the the room down the hall and take the key box from the desk
33) The three posters should now all be green and look like this,
—Now go to the computer
34) the keyboard of the computer has three green lights that symbolize CAPS lock, Num lock, and scroll lock. (from left to right)
35) From the dot combinations from the TV, enter the three dot combinations in any order, and hit return after each combinaton (black dot means a green litght, white means no light). This will turn all the signs to \o/
—NOTE: For some reason, the second code from the TV did not work for me, so if one of the codes doesn’t work, try one of these. First code: (G) green (S) off (G) green, then press Return, second code: SGG, then Return; Third code: GGG, then Return
36) If you have done everything correctly, there are now more cube pieces to collect, the internal pieces.
37) Orange one - > where the battery 2 was; White - > in the toilet completely on the top right when you zoom in (behind your inventory bar so you may have to shrink the bar); Green - > on the pot plant; Blue - > to the left of the small lamp; Yellow - > use the cutter on the front of the right sofa cushion; Red - > in the window with the picture of the skyline
38) Assemble the cube, turn out the lights, place the key box in the box of light, get the key, and use it on the trap door. - > 100% COMPLETE!!

Source: Escape the Room


Technorati Tags
Read More
    12

PS3 60GB Supply Depleted

Having seen a sharp rise in sales since the price cut (ahem), Sony has revealed to Macworld that the company’s stock of $499 60GB PS3 inventory has depleted and that all units are now available in stores until stock lasts.

“We no longer have any inventory in SCEA warehouses. All inventory has been purchased and shipped to retailers,” Karraker said. He continued, saying that there is “ample supply” still left in the channel. It was initially announced that there is enough 60GB PS3s to last a couple of months.

Meanwhile, a Sony representative has said that there will not be any further price cuts or announcements regarding the console until the 60GB supply are used up and market conditions are evaluated. If you haven’t yet gotten a PS3, get yourself one while supplies last!

Source: Digital Battle

Technorati Tags
Read More
    1

Earn 'Cash for Kills' in New Shooter Kwari

Playing games for money is nothing new, but a game called Kwari is hoping to shake up the tournament formula and make the competition more personal.

Kwari
is a free-to-download FPS in which players put their money where their skills are by agreeing on a "per hit" rate of one penny to one dollar. Every time you score a hit, that amount of cash is taken from your opponent's account and put in yours, with the reverse happening when you're hit yourself.

Money earned from self-inflicted damage, like from a fall, gets put into communal jackpots, which are awarded on a regular basis. Players are matched based on skill, so that (theoretically) no-one ends up feeling completely robbed. None of the prize money goes to the "house"--they collect their cash by selling players ammo at a fixed rate.

If you're intrigued, sign-ups for the beta are now open.


Source: Game|Life

Technorati Tags
Read More
    1

Karame Escape - Walkthrough

Karama Escape is another Japanese point and click room escape game. You are now in a little room and you are locked there. So, you need to escape the room by finding and using somethings. Good luck!!!

Play Karame Escape

Walkthrough:
Take safe
find blue note (under the door)
find yellow note (behind poster)
find green note in fridge
take blue thing (pilot)
find blue key (use blue thing) under the TV
find red note (behind clock)
open box ner poster with blue key - take screwdriver
open safe (use screwdriver)-take note
tape password in box near clock (clue is on the poster)- take key
Finish.

Solución en Español: El Comentario
Source: Escape the Room


Technorati Tags
Read More
    1

Cop Baby - Walkthrough

Cop Baby is a very strange point-and-click game, in which someone has left a baby on your doorstep and it's your job to bring it into your home and raise it to be a good cop baby.
Good luck!!!


Play Cop Baby

Walkthrough:

1.Drag shoes in fire.
2. when you hear a knock, go to the door
3. Open the door
4. Click the baby at the bottom
5. click note
6. Click anywhere
7. Go into kitchen
8. click refridgerator
9. Take bottle
10. Give it to baby
11. put bottle on counter in the kitchen
12. fill bottle with coffee
13. give bottle to baby
14. go back to refridgerator
15. take a donut
16. blend it
17. pick up the bowl (in upper cupboard)
18. Put bowl on counter
19. pour Donut juice into bowl
20. give bowl O' donut juice to baby
21. start screaming.
22. Pick up paper to left of crib
23. Pick up police manual from living room and give it to baby
24. open front door
25. take the package inside
26. take baby from it
27. put in crib
28. repeat step 24-27
29. put siren on top of couch in crib
30. Pick up toy and put it in crib
31. When babies start beating each other up, put cop baby in the middle
32. open door and get box.
33. give badge to cop baby
34. get note from forehead
35. give him toys until it says you win.

Solución en Español: El Comentario
Source: Nordinho


Technorati Tags
Read More
    3

Electronic Arts: PS3 Just Sucks

When it comes to Electronic Arts, they don’t hide what they want to express. They either say everything or say nothing at all. An unnamed employee at EA Tiburon, a video game development studio known for working on Madden and NASCAR, said some pretty nasty things about the Playstation 3’s ease-of-use for developers.

“The truth is the PS3’s tools and the way it works just sucks,” the unnamed employee is quoted as saying. “The truth is they are both virtually the same in terms of hardware when it comes to how powerful they are, maybe the PS3 has a few different things that makes it a bit more advanced, and Sony has this idea that it is designed for optimal development but that’s a load of crap.”

So, obviously someone has a feud with the system. He then continues,

“In the last generation we would make the game for PS2 and then port it over to Xbox, but because Xbox was easier to develop for, we could actually enhance the title a little if we wanted to. The case with this generation is different, now we make the game for 360 first and then port it over to PS3, but we really don’t have the time to mess with how the PS3 works to really add to much more. It will change in the future, but for now it sucks.”

Again, the quotes are from an unnamed employee, so it could be that this was just generated by some fanboy lurking on the Internet. Although, if it turns out that these words did come out of a legitimate staff member’s mouth, there is a chance public relations between Sony and Electronic Arts won’t be as secure as they have been in the past.


Source: Digital Battle

Technorati Tags
Read More
    1

War of Supremacy - Multiplayer strategy in your browser

Play WWII War of Supremacy

WWII:War of Supremacy is a multiplayer online game set in the time of WWII and great chaos among nations.

The axis powers (Italy, Germany, Japan) are pitted against the allied powers (America, Britain, Russia) in a turn based frenzy for world domination. The game is text based and played in your browser so no downloads are required to play.


The game is free to play and the community is home to some outstanding people. WOS offers many clans on both sides that can provide training and game knowledge to newer players. The community is very supportive and the competition is very fierce.

The game ownership changed to Eliteworx, LLC in late 2006. Since that time many changes have taken place to update and advance the game. All the bugs had been fixed and new ones that may arise are dealt with immediately. Recent updates have made the game more self explanatory for newer players. If you have played the game in the past but haven't played in a year or so, come back and give it a shot again. You will find the game has been advanced to a level never before seen.

WWII War Of Supremacy - try it today! www.WarOfSupremacy.com


Technorati Tags
Read More
    3

Escaping From Her Room - Walkthrough

Escaping From Her Room is another Japanese point and click type escape the room game. In this game, again you are locked in a room and you try to escape there by finding and using items with clues.
Good luck!!!


Play Escaping From Her Room


Walkthrough:

Solución en Español: El Comentario

Don´t open the closet

Get the red pencil from the red container.
Click on the drawers to zoom in.
Open the first drawer to get a sharpener and a notebook.
Open the second to see a green bag. Click around the top right of the bag to find a hidden screwdriver.
Use the screwdriver on the third drawer to get a wristwatch. ( Useless).
Close the drawer and zoom out.
Check the trash for a piece of paper.
Sharpen the red pencil b clicking on the sharpener, then the about item button.
Click the pencil and use it on the hole in the sharpener. Click on the pencil and you´ll have it sharpened.
Inspect the notebook with the "About Item" button and click on the folded page.
Use the paper from the trash on the page on the right and use the pencil on it.
You´ll get a red number.
Turn right, look at the calendar. If you click on the marked date, it says that date is the girl´s 20th Birthday.
Turn left. Use the computer and type in the girl´s birthday as the password.
Sequence is YYYYMMDD
19870702

The screen will show Japanese words,
Top Left: Ringo ( Apple )
Top Right: Mikan ( Japanese Orange)
Bottom Left: Banana ( Banana )
Bottom Right: Budou ( Grape )

These fruit´s represent a colour which corresponds to some of those hidden in the room. Then, use the numbers that corresponds with the colours, on the green bag.
Where to find numbers:
Apple (Red) - On paper
Orange (Orange) - Drawer on the right of bed.
Banana (Yellow) - Calender
Grape (Purple) - Behind the computer
5(Red),9(Orange),2(Yellow),8(Purple).

Open the bag and get the key. Use the key on the door and you´re out.


Technorati Tags
Read More
    0

Haluz 2 - Walkthrough

This is a sequel to Haluz, a cute point and click game. Help the little hero in his rescue mission.
Good luck!!!


Play Haluz 2

Walkthrough:

Solución en Español: El Comentario

Wait for the introduction to finish and your hero to start off on his adventure. Then click on the lock next to the door. Then click on the raccoon hiding in the lamp on top of the hill. Click on the cord to turn on the light. The code for the lock shows up under the light on the door. Punch in the code and then turn the wheel.

Click on the light switch next to the door. Turn it to the right to move the bat to the right. Turn it back to the left to get the bat to come back. Take the hook up next to the bat and attach it to it. Turn the light switch back the other way to move the bat again. Click on the basket to jump across.

Wait a few moments, then click on your hero to 'pollute' the water. Wait some more for the flowers to grow and expose the man in the mountain. Click on the left most flower.

Take the pine cone out of the man in the mountains mouth and place it under the clock as a counter weight. Click on the clock face until the horse starts coming out (4 o'clock). Your hero will jump on and disappear.

Click on the walkman the old shaman is listening to. Click on the bottom right music code to make him float (looks like an alpha symbol to me). Turn the volume up to make him float higher. Click on his beard to get the key to drop out. Put the key in the lock to get your hero out in his flying boat.

Enjoy the scenery.

To get the snake to let you go, turn on the water (right side, red knob). Turn the left wheel on the pump (bottom middle of scene). Turn right wheel, then turn the left wheel again. Then click the pump. Turn the left wheel again to release the bees. Click on back of boat to get hero on his way.

Wait till hero stops his boat. Click on hummingbird on flower pot above. When the bird comes out to eat fruit, click on plants with eyes above to steal it (may require some timing). Click on eyes again to drop fruit, dropping big bird into pot allowing you to move on.

Click on glass to get your hero to attempt to lift it up off of the girl. He's not strong enough. Halfway up on right side, there is a claw holding an orange ball. Click on it, then immediately click on jar below it to swing it out (requires timing) to get ball to drop into jar. Click on fly on far left. While it is on the mushroom, click on iguana (top left).

Enjoy end scene and sales pitch for full version.

Source: Games on the Web


Technorati Tags
Read More
    1

Power Rangers Super Legends preview

Power Rangers: Super Legends has a release date of October 23rd (US) and 2nd November in Europe for Wii, DS, PS2, GameCube (as the last GameCube title!) and PC.

The game will celebrate Power Ranger’s 15th anniversary by gathering selectable Power Rangers from fifteen seasons of the series, from Mighty Morphin Power Rangers to Power Rangers: Operation Overdrive, and will include not only characters but Zords as well. The game has been described as a blend of puzzle, action, and mission-based adventure with both single-player and co-op play (exact number of players not specified, but hopefully four on Wii at least), although one site says the DS version is a sort of “mini-game collection”, but it doesn’t seem that way from the screenshots (viewable below).

You will also battle classic enemies from throughout the series, including Lord Zedd and locations range from Angel Grove to an “Ancient Ranger” temple. You will be able to unlock powerful special moves and use devastating super attacks while battling the games many enemies and bosses. The game is being developed and published by Disney Interactive Studios. No word yet on whether or not the game will use the Wii Remote & Nunchuck for gesture controls, but you’d imagine so.

DS version features include:
- Beautiful 2D world across 24 missions with comfortable controls and intense fights
- Playable cast of favorite characters that span the show’s history and storyline
- Massive combo chains with cinematic flair
- Several enemies simultaneously on screen to represent overwhelming odds to keep players on their toes
- DS stylus attacks to personally deliver finishing blows on specific opponents
- Variety of vehicles to pilot, including Flyers, Light Skimmers and One Man Attack Craft
- Multiplayer co-op allows players to fight together, showcasing the teamwork of the Power Ranger series

There are over 12 playable characters in the game. In the table below you can see the name of the character, their color and what Power Ranger series they hail from:

Power Ranger Color Series
Jason Lee Scott Red Mighty Morphin Power Rangers
Kimberly Hart Pink Mighty Morphin Power Rangers
Adam Park Green Power Rangers: Zeo
Justin Stewart Blue Power Rangers: Turbo
Leo Corbett Red Power Rangers: Lost Galaxy
Trip Green Power Rangers: Time Force
Dustin Brooks Yellow Power Rangers: Ninja Storm
Hunter Bradley Crimson Power Rangers: Ninja Storm
Doggie Cruger Shadow Power Rangers: S.P.D.
Sam White Power Rangers: S.P.D.
Mack Hartford Red Power Rangers: Operation Overdrive
Dax Lo Blue Power Rangers: Operation Overdrive


Source: VideoGamesBlogger

Technorati Tags
Read More
    3

Yuria's Room 2 - Walkthrough

Yuria's Room 2 WalkthroughThis is the sequel to Yuria's Room, created by the same author as Yuria's Hotel. Collect items and use them, and also solve puzzles in order to escape. There is no language barrier to finish the game.
Good Luck!


Play Yuria's Room 2

Yuria's Room 2 Walkthrough:

go out the door. notice on left column: star=6
go back in room, go left. open window several times, a key will fall out.
zoom at key click on it a few times and you’ll see that it is an usb stick.
take note from first drawer and one from the second. a book from the last.
notice on the bottom left side of the cupboard : reversed heart= star …so the heart nr is 9.
now look at the second note there is a code for how to get the heart. open the drawers in the row the numbers on the piece of paper say it.
go to the laptop. click on bottom rigth side of laptop. there is an usb inputthing. usw usb on it.
click on webcam.
solve the sliding puzzle…(yes,i hate it, too) dont know how i solved it,either
click on shape on the wall, youll get a screwdriver.
use it on green plate.
take plate and look on the backside. it says 1. when you put the pieces together in your mind it is ᬐ = 7+1 so it is ᬐ=0.
put in the heart and click on the symbols for the right numbers. it is 609
click on the shape on the wall and get a handle.
place handle in thing next to door.
now look at the fairytale book and notice the symbols from the book. (crown, sword, fireball). the colors from the codebar have to match the colors in the book.
finally you are out!

Source: Escape the Room


Technorati Tags
Read More
    0

DayMare Town - Walkthrough

DayMare Town WalkthroughDayMare Town is a point and click type puzzle and escape game from Mateusz Skutnik, who is also creator of Submachine game series. You are stucked in a town and you have to find a way to go out.
Good Luck!


Play DayMare Town

Update: DayMare Town 2 Walkthrough

DayMare Town Walkthrough:

Solución en Español: El Comentario

Click on the well
Click on coin located on the left ledge of the well
Just to the left of the well and very small is a hook
Click back to the main screen
Click on the sky
Click to the right lower half of the chimney, see 1st bird
Click on the stone down left of the well
Left and a little up from the stone is some string
Click to the right of the stone, but still on it and you go behind the stone
Take key
Go back to main screen
Click on the left most building’s ledge, see 2nd bird
Go back to main screen and go to Amory
Click on door and look at base of staircase at small cabinet door
Open doors and get screwdriver
Click on sad clown looking man
Notice the position of the packman like buttons
Go up stairs and look to the right of the column and get cloth
Go downstairs then click on office area to the right
Click on area to the right of the window where it looks like the wallpaper is rolling down
Click in the light part of the chimney area to see 3rd bird
Click back to original screen
Click on Book House
Just to the right is an opening, click it
Get lighter
Go in Book House into elevator
Go to floor 1
Click on house picture
Click to the right to see something behind picture
Take scroll
Click back to close up of picture
Click to the right of the chimney where it looks like a string is there
See 4th Bird
Click back to larger view of floor
Click to the right and collect book
Go to floor -3
Turn around
Go towards black passage
Collect round pie shaped piece
Go back in elevator to floor -2
Click to the right of the damaged light switch to get puzzle
Put packman looking pieces in same order as clown picture in armory
Collect triangle piece
Go to the right where the scissor and rock are
Click on rock and put scroll under it
Rock breaks to reveal square piece
Go back to elevator and go to floor -1
Click to the right where the bookshelves are
Click on book with the small dot fourth shelf down quarter over from right
See 5th bird
Take elevator back to 0 floor and go to main screen
Combine screwdriver and cloth
Combine string and hook
Click on sewer grate above the well
Use hook/string in sewer,
Get round piece
Click back to main screen
Click on passage
Click passage again and see hole branching from grate
Put screwdriver with cloth in hole
Light with lighter
Give coin to man
He gives you Square holed piece and takes torch
Click back to main screen
Click on Armory
Click close up on missing round piece to left of door
Place round piece in slot
Click in Armory and go to top floor revealing an L shaped piece
Go downstairs
Go through door to basement
Go to the left of the hooks revealing a sink and a scary bearded man
Give the book to the man and he starts to read and a reverse L shape falls out
Click on sink and use hook and string to fetch key
Click back to main screen
Click on city hall
Go in and click on back most left door
Click top right to view long chimney type area
Click on nest to see 6th bird
Click back to hallway with all doors
Click above wooden plank at top
Click to the right part between wood planks in the middle to reveal 7th bird
Go back to main hallway
Click on second door on right
Click on box to right of the desk on the floor
Use key to open box
Get U shaped piece
Go back to hallway
Click on middle of screen by railing
Go to the left
Go downstairs
Go downstairs again
Click on top of circle
Click on right circle
See 8th bird
Click back to circle
Go right see machine
Click on left part of banister
See 9th bird
Go back to front of city hall
Go left
Go upstairs twice
Open door with key
See chained man
Look out window middle top left in tree
See 10th bird
Go downstairs facing bottom of staircase
Go left and left again
Take golden egg from pedestal
Go back up stairs
Give egg to chained man
He disappears
Go back to city hall
Go down the hallway to the right and place pieces and push buttons
Go back up and to the left and place remaining pieces and push buttons
Go downstairs to big machine
Pull handle
Click on handrail at top of staircase
End
Read More
    21

Covert Front ep1 - Walkthrough

The creator of the Submachine series has launched a completely new point-and-click series called Covert Front Episode 1: All Quiet on the Covert Front. This is the first episode. "In Covert Front you are a secret agent code-named Kara in an alternate history version of World War I. Assigned to infiltrate the mansion of a German scientist, Karl von Toten, you must discover the secrets that lie within and escape with your life."
Good luck!


Play Covert Front ep1

Covert Front Walkthrough:

Solución en Español: El Comentario

You begin in front of the main entrance. Go right. Pick up GARDEN HOSE by vines.
In the wooden box, pick up GARDEN SCISSORS.
On the wall with the vines, click to find an electric panel. Use scissors on the wires.
Open the door and head in.
Check the picture of the woman on the wall to the right. Notice the time on the clock. 2:35.
Go into the second door on the left. A dining room. Check the clock. Change the hands to the appropriate time. Grab CLOCK KEY.
Go through the doorway on the left. Kitchen. Grab the MATCHES between the grates in front of the fireplace.
Open the middle drawer and take a look inside. One utensil is different from the others. It is an ICE PICK. Grab it.
The opening to the left leads down to the basement. Turn on the light switch. Connect the hose to the contraption by the entrance.
Head back upstairs. In the hallway, under the stairway on the right (very hard to see) is a small storage doorway. Click on it to zoom in, use the icepick on it to unlock it.
Pick up CROWBAR inside. Leave.
Go outside to the manhole (the side with the wires). Use crowbar to open it, leading to a valve. Twist it and get back to the basement.
When the water drains, grab the SILVER KEY. Go back, and upstairs.
The first bedroom on your right has clues to check out; most importantly the end table. Pick up the BOOK and leave.
You can enter the second bedroom for a clue if you want.
Open the right-side bedroom with your key. Place the book in the spot on the lowest shelf. Now, you may notice you can take books out to see their covers. No, it’s not a game of memory. You must pull out the two books with the symbol that is the same as you’ve been seeing all over the house. The eagle crest. When pulled, a secret door opens.
You’re now in a kind of lab. Read the torn book on the desk. Go to the rear table and collect the PLANS. Go to the hideaway desk and use the clock key to open it. Pick up the SIGNET RING.
This has a crest on it as well. Go downstairs, to the end of the hall with the portrait. To the left is a crest indentation. Use signet ring on it. A door opens. Go in.
Go down the ladder and use the matches on the oil lamp. Pick up the FUSE on the ground. Head right twice. Machine room. Use the fuse on the machine. Now you can operate it. Notice the pictures of flying machines on the wall. Go right.
Grates. Use your crowbar. It will break. Watch the short sequence. You’re now in a dungeon. Turn the corner, light a match. To be continued…

Source: Nordinho

Technorati Tags
Read More
    0

Aliens vs. Predator: Requiem (2007)

For those of us hoping that AVP2 is better than AVP1, our prayers seem to have been answered. IGN has the new red band trailer for the spin-off sequel, and it looks pretty damn good.

It begins with an appropriate tagline: "In space, no one can hear you scream. On Earth, it won't matter." Then, it's pretty much everything we'd hoped the first Alien vs. Predator movie would be. Well, to be honest, I had wanted a human free, dialogue free movie featuring only the Aliens and the Predators, but this is definitely my second choice.

It isn't even just that the sequel is Rated R, unlike its PG-13 predecessor, and that this uncensored trailer gives us more gore and violence than the anything in the first movie. It's that the Strause Brothers (sibling effects-wizards-turned-directors Colin and Greg) and screenwriter Shane Salerno seem to have the right story for us fans of the original franchises. From the Alien series we have a government/military that doesn't care about civilian life (this is also popular in other horror films of late). From the Predator series we have the thick brush of a forest (almost jungle-like) for more thermal-vision stuff -- which just wasn't as interesting in the cold, arctic setting of the last effort.

Of course, the R-rated stuff is pretty sick, too. As is the seemingly Spielbergian touches: the flashlights in the woods searching for an alien, but it isn't E.T.; a very Jurassic Park-esque scene with Alien young substituted for Velociraptors. Hey, I know it won't possibly be as good as any Spielberg movie nor will it likely be as excellent as the real installments in either franchise. But it still looks awesome. I just hope the trailer hasn't spoiled the best killings -- that Predator knife thrown at the blonde, the double head-shots, the eyes poked out -- or the ending with that final shot with the F-bomb and the Alien kill, which looks climactic. Anyway, one thing is clear: Fox is really going with that Requiem subtitle,

Source: Cinematical

Technorati Tags
Read More
    1

Submachine Zero - Walkthrough

Submachine Zero WalkthroughAnother game from the maker of Submachine series. This game is shorter than other Submachine games, but still you have to search to find items and clues for figuring out.

Play Submachine Zero

Submachine Zero Walkthrough:

Solución en Español: El Comentario

1. Go right and pick up "Tongue 1" from on top of the golden thing. Pick up Lighter from the wall, somewhere around the middle of the screen.
2. Go left twice and pick up "Tongue 2" from in between the pieces of rocks on the floor.
3. Go to the first screen (Door with weird looking alligators or whatever they are) and put tongue one and tongue two in each alligator, accordingly. Click on middle of door, it will open. Enter chamber.
4. Go down stone steps and use lighter to light torch on the left. Go down again.
5. Go right and again use the lighter to light the torch (or whatever it is).
6. Go down and click on the button looking stone, it will move down. Now you can go back up and go into the room to your left.
7. Click the cube on top of the stand once. Go right, down, right, down and into the opening to the right. Pick up the red jewel (Jewel 1). Go back up to the cube and click again. Go back down and into the opening on the floor, pick up the jewel. Go back up and click on the cube again. Go down again and into the opening to the left. Pick up jewel and a square stone under the opening.
8. Go up, right outside the room with the cube go right twice and use the stone to stop the 2 bottom spears from attacking you, go into the room (to the right).
9. You'll see a stone doeg with 3 stone blocks. Use Jewel 3 on the first hole on topmost stone, Jewel 2 next and jewel 1 last. All 3 stones move up, revealing an opening on the ground.
10. Go down and click on the wisdon crystal. End of game.

Source: Escape the Room

Technorati Tags
Read More
    0

Submachine FLF - Walkthrough

Submachine FLF (Future Loop Foundation) is another sequel of Submachine point and click room escape games created by Murtaugh. "In Submachine F L F you find yourself locked in a padded room with only an ancient tape player at your feet. From this strange beginning unfolds an amazing mystery that you can solve in a world where memories are the key to the past, present, and future! Who are you, and why can't you remember how you got here? Who is the Future Loop Foundation? What do they want, and why are they holding you prisoner? Play Submachine FLF and solve the riddle for yourself!"
Good luck!


Play Submachine FLF

Walkthrough:

Solución en Español: El Comentario

Part one:
1. Press second button from the right on the cassette player, a key will come from under the door.
2. Use the key on the door it will open.
3. Go out, go up the cliff and pick up the knife
4. Come back to the room and cut the materace where it’s been sewed (second one from the top) a keycard will occur.
5. Use the card on the reader outside and push the button.
6. Look and the sign above the door and notice your patient number.
7. Go to the other side and the to the bottom. Then go left.
8. Look at the wall and note the marks.
9. Go to the top and turn right.
10. Go into the storage and find a slide in one of the chambers
11. Come back to the entrance fo the right “tower” and go right to he room with the projector. Enter the slide and turn it on.
12. Look at the wall and you have switched place.

Part two:
13. Go down and right, enter the first room.
14. Go left. On the machine on the wall select the marks noteiced earlier from the wall.
15. Take the reel that occurs
16. Go back upstairs and right to the end of the corridor.
17. Enter your patient number on the pad.
18. Go right to the end. Put the reel on the projector and turn it on.
19. Voila you’ve won.


Technorati Tags
Read More
    0

Submachine 4 - Walkthrough

Submachine 4 WalkthroughSubmachine 4 - The Lab is fourth episode of Submachine point and click game series has been released by Mateusz Skutnik. "Submachine: The Lab. The game in which with every puzzle solved, every chapter finished you fall deeper and deeper into mystery. Fourth chapter takes us to the heart of the submachine, the place where all questions will be finally answered. Or were finally answered. Once again it's time to ask youself - is it possible that you're too late? "
Have fun!


Play Submachine 4

Submachine 4 Walkthrough:

Solución en Español: El Comentario

The Lab

1. Find the hammer and break the padlock on the shutter. Enter the attic.
2. Find the chimney brush, go back to the roof and tossit into the chimney. Go back to the attic and collect the door key from the chimney. Also find rubber tube, gas handle, the key, and naphthalene from the suit pocket.
3. Open door using door key and enter the lab.
4. Upper floor of the lab: click on the green computer and using the button talk to Murtaugh. After a short chat he will print out the list of known locations. Take it from the printer. On this floor collect the lighter as well.
5. Go down, collect the beaker. go down to the main floor of the lab.
6. Go left into the bathroom and place the beaker on the grate on the floor. Using the hammer knock off the plug on the pipe above the beaker.
7. Exit the bathroom. Go right to the room with the ladder. Collect a cd there and go up. Collect IronTrioxide from the holder and go right. Collect the screwdriver. Use the rubber tube to connect the burner to the yellow pipe. Also use the gas handle on the pipe. Turn the gas handle, switch on the burner, and light the flame using the lighter.
8. Go all the way back to the roof and on the far lef side use the screwdriver to release the valve. After the screw falls down, collect the valve.
9. Go back to the lab and go into the bathroom. Collect the soap from the sink. Place the valve on the vertical pipe and turn it. Now you can collect the full beaker.
10. Go to the burner and place full beaker on the burner. Drop soap, IronTrioxide and Naphthalene into the beaker in this order. Collect AcidiOxide and the now-empty tester.
11. Go back to the bathroom and fill the tester as you did with the beaker before. Collect water. Go two rooms right, there are two pieces of paper on the desk, collect them. Go to the far right, use the key on the locked door and enter. Click the bell. Use AcidiOxide on the crate mechanism. Go right again and collect the note behind the portal.
12. Enter 1-0-4 on the portal and click the large button underneath the numbers. You’ll be taken to…
Ancient Location
1. Find the pedestal with four vertical switches. There are four signs on the switches: “/” “|” “_” “\”. There are also four small doors with symbols on each of them. Turning the right swithes will open them. For example, if you click on switches “|” and “_” it will open door marked with “+”. And so on. Open four doors, you should collect these items: stone key, blocade, tile D, tile B and a knife.
2. Go one room up from switches and use blocade and stone key. New ladder will come down. Before going up turn all switches down, go up, go up again, where another small door will have opened and collect tile C. Go all the way to the top, use knife to cut the rope. Go all they way down again and collect tile A.
3. Go down to the room with the dog. Use all tiles on the wall machine, and click the button that is revealed.
4. Go back to the portal, there is a new ladder going up. Go up and collect the coil. Go left, collect the note and get back to the portal. Type 5 - 2 - 9 into the portal and teleport to…
The Basement
1. Go two chambers to the right, there is a coil charger. Place coil on it and pull the lever. When its done, collect charged coil and go to the bottom left room. Place the coil in the machine and flip the switch.
2. When its charged, repeat recharging coil for similar machine on the bottom right (take the coil out of the first machine and go recharge it). After that turn the switch on the machine in the middle room. A laser beam will appear. Go two rooms up from here and put the cd on the holder to bend the laser beam.
3. Recharge the coil again and go to the portal. Type 6 - 9 - 0 and teleport to…
Looping Trap

1. Rooms in this section are placed in a coordinates system. The portal is in room (0, 0). Go left, and you’re in room (-1, 0). Click the machine so it shows 1, 1, press the button at the base of the machine, then go to the room (1, 1) and click the button that has appeared there.
2. Repeat the same for (1, 0), (0, 1) and (-1, -1). Don’t forget to click the button after setting the coordinates!
3. After that go to room (-1, 1) and collect the orb.
4. Go back to the portal. type 5 - 2 - 9 and go back to…
The Basement (Revisited)
1. Go to the room with a pedestal and the laser beam that has been bent. Place the orb on the pedestal. After it breaks, collect the chest key. Go back to portal. Type 5 - 5 - 1.
Brick Room
1. Turn off the water in the pipes. On the portal type 4 - 6 - 2 and go to…
Lighthouse
1. Go all the way to the right and find the pipe section with the padlock on it. Break the padlock using hammer. You have to strike it four (4) times to break it. Collect the turbine. Go back to the portal and type 8 - 0 - 0.
The Ship
1. It’s dark. You have to light the lamp first (middle left) - use the lighter.
2. Go right and unscrew the metal hatch using the screwdriver. Use the knife to cut the wires.
3. A new ladder appears in the far left room.
4. Go up. Use the lighter on the lamp again. Go right and up, use the lighter on the lamp again. Put the turbine into the pipe and close the round metal door. Go down, push the switch, the grate goes up, go right again.
5. Use the chest key to open the chest. Collect the arm. go back to the portal, type 7 - 7 - 0.
The First Tomb

1. There are no rooms here, just this chamber. But if you look closer, there is a sign on the right wall (click to zoom in). A circle, a square and a triangle. So type 0 - 4 - 3 on the portal and teleport.
The Second Tomb
1. Use water on the big shining bubble. Water is in the test tube you collected from the lab. Collect the sceptre when it appears.
2. Go back to the portal, return to the Ancient Location (1 - 0 - 4)
Ancient Location (Revisited)
1. Go up, place the charged coil on the machinery. Go left, turn the lamp on, and look through the lunette. You’ll see another coordinates. 4 - 5 - 2. Go back to the portal and teleport to that location.
Statue
1. Use the arm and the sceptre on the statue…and you’re out!

source:Arcade Town
Read More
    2

Submachine 3 The Loop - Walkthrough

This is the third version of the Submachine series made by Mateusz Skutnik. Click on doorways and ladders to move around. Click on items to interact with them.

Play Submachine 3 The Loop

Walkthrough:

Solución en Español: El Comentario

Level 1:

Go to the room (1,0) and observe the grid on the wall. The “x” is for the first room (0,0).
Go to the rooms (0,-1), (1,-1), (1,1), (0,1), (-1,1), (-1,0) and click the lever. Go back to the room (0,0) and click the lever.
Level 2:

Go to the room (1,0) and observe the grid on the wall. The “x” is for the first room (0,0).
Go to the room (1,1), click the device, go to the room with the given coordinates (X,Y), click on the device, go to the next room with the given coordinates (X,Y), repeat until all lights in top left are full. Go back to the room (0,0) and click the lever.
Level 3:

Go to the room (1,0) and observe the grid on the wall. The “x” is for the first room (0,0).
All the devices in the rooms (-1,-1), (-1,1), (1,1) and (1,-1) have one digit locked. Note for each device the locked digit and the position of the device. Set all the 4 devices with the numbers you just took note of. Click the lever in rooms (0,1) and (0,-1). Go back to the room (0,0) and click the lever.
Level 4:

Go to the room (1,0) and observe the grid on the wall. The “x” is for the first room (0,0).
Each device in the rooms (0,2), (-1,1), (-2,-1),(0,-1), (2,-1) and (0,-2) has a number of balls above it (from 1 to 6). Click the device in the room with one ball and then the device in the room with two balls and then the device in the room with three balls, and so on. Go back to the room (0,0) and click the lever.
Level 5:

Go to the room (1,0) and observe the grid on the wall. The “x” is for the first room (0,0).
For each device in a room (X,Y), set the coordinates of the room translated into letters (1=A, 2=B, 3=C, etc). Example: set coordinates (A,B) for the device in the room (1,2). Go back to the room (0,0) and click the lever.
Level 6:

Go to the room (1,0) and observe the grid on the wall. The “x” is for the first room (0,0).
In the rooms (-3,2), (-3,-1), (-2,1), (-1, -2), (1,2) and (2,-1), you will find some symbols and a number from 1 to 6. Take note of these symbols and their corresponding numbers. Now, go to the room (-1,0) and set the first symbol (from left) to whatever symbol was marked 1, and so on. Click on the button on the floor. Go back to the room (0,0) and click the lever.
Level 7:

Go to the room (0,-1) and activate the switch. Then go to the room (0,1) and write down the order of the slashes. Go to the room (1,-1) all the way to the room (6,-1) and set each device so the green lights correspond with the slashes (One slash, one room). Go back to the room (1,1) and click the lever. Go back to the room (0,0) and click the lever.
Level 8:

Go to the room (1,0) and observe the grid on the wall. The “x” is for the first room (0,0).
Take note of the coordinates of each room with an egg-shaped device. Go to the device in the room (0,-1) and then use the buttons to input the coordinates of a room with an egg-shaped device. Click the lever below the buttons and then go back to this room. Click the two, and repeat for each egg-shaped device. Go back to the room (0,0) and click the lever.
Level 9:

There are two devices in rooms (0,1) and (0,-1). The first one (0,1) lets you set initials for colors (note that there are fixed initials). The second one (0,-1) lets you change the colors (note that there are fixed colors). Match the initials and the colors and then press the button in the room (0,-1). Go back to the room (0,0) and click the lever.
Level 10:

Copy the map from the room (1,0) to the map in the room(-1,0). Go to the room (0,-1) and click the lever. Go back to the room (0,0) and click the lever.
Level 11:

Read the note in the room (0,0). Find the leaf (located in one of the rooms next to the room (0,0)). Go to the room (-12,9). Drag the leaf on the stand. Congrats and… to be continued.
Option: Go to the room (1,0) and observe the grid on the wall. The “x” is for the first room (0,0). Go to the rooms (0,1) and (0,-1). Note for each color initial the corresponding value (between 1 an 6). Example: BPY=231 means Blue =2, Purple=3 and Yellow=1. Go to the rooms (-1,1) and (1,1) and set for each color the right level by using the buttons. Example: Purple=4, use the bottom button two times to decrease the level of the purple color to four. Go to the rooms (-1,1) and (1,-1) and click the levers. Go back to the room (0,0) and click the lever. You die of dehydration: sorry about that!

Source: Free Games News


Technorati Tags
Read More
    0
© 2017 Online Games. Designed by Bloggertheme9 | Distributed By Gooyaabi Templates
Powered by Blogger.